Friday, August 27, 2010
Back To School Basic Hairstyles - Part 2
A few more quick and easy ideas to add to our back to school hairstyles collection. Enjoy! :)
We're calling this hairstyle on the left "hippy braids." I think not braiding all the way to the middle gives it a fun and fresh look. And on the right, a simple french braid with a ponytail.
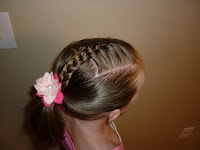
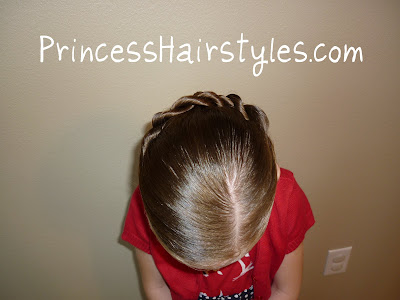
A dutch braid headband with a messy braid bun.
French braid in front to a messy bun on the side.
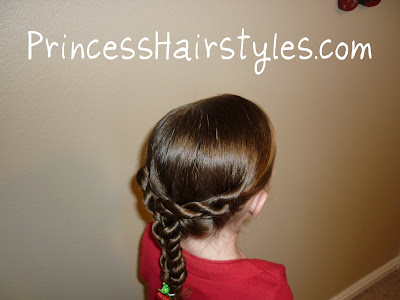
Twist braid bun with a ribbon headband.
The hairstyle image on the left is basically this french braid hairstyle, just made with a ponytail instead of a half pony. The image on the right is a quick twist braid and some sidewinders.
Both sides pulled back with clips on the left (with face painting. ;) And a sidewinder with curls made from braids on the right.
Well, that was fun. Nothing new or extravagant, but sometimes quick and simple can be good too! I've found that when we're really in a rush before school, a cute hair accessory can make all the difference (even with a plain ponytail.) Have a nice weekend!
Tuesday, August 24, 2010
Back To School Basic Hairstyles - Part 1
This is part 1 of several basic hairstyles for little girls posts....
A few of you have asked if I do The Princess's hair all fancy everyday. The answer is: Most definitely, NO. :) Especially not on most school days. Truth be told, we usually spend about 5 minutes on The Princess's hair each morning before school.
And since it's "back to school time" around here, I thought it would be fun to post some quick and basic 5 minute school day hairstyles. None of these are anything special or unique and no step by step instructions are necessary. I just thought it might be nice to have some basic hairdo ideas to browse through for school mornings. Because if you're like us, we get tired of the same old ponytail every day.
First up: Double French braids with a ponytail.
Next: A pull-through and a pony.
A side ponytail with headband connectors.
Fishtail braid with a ribbon headband.
Basic ponytail with an added sidewinder. And, a fishtail on the side with a flower.
Quick french braid on top with a flower. And waves made from braids (done the day before) with "Barbie Bangs."
Simple barrette on the side. And lastly, a couple of quick cornrows on top.
Watch for Part 2, coming soon. :)
Wednesday, August 18, 2010
Simple And Fancy Headband
A quick hairstyle idea to add some flair to a simple headband and braided bangs......
First make a part from ear to ear. Then, make another small part in her "bangs" on the side. Take the hair/bangs on the side of the part with less hair and brush it to the back. Now place the headband over the part from ear to ear. I should have taken a picture of the other side, but all of the hair on that side should be underneath the headband at this point.This "headband" is actually just a folded stretchy piece of fabric we had from a dance recital outfit that is tied underneath her hair. You could use a ribbon, head wrap, actual headband, or whatever you have available.. Starting at the side part, begin french braiding the front section of hair (only adding hair in from the front.) Every couple of plaits, split the strand next to the headband in half and set one half aside while you continue braiding. Braid down to the end of her hair and tie off with an elastic.
Using some pomade and water, smooth out the leftover strands. Then add in the end of the braid and position everything where you want it to lie. Tie together with a rubber band.
To keep everything in place, add some crossing bobby pins next to the rubber band.
Now you can add a fun flower or bow to finish it off and hide the bobby pins.
This hairdo reminds me a lot of the rays of sunshine hairstyle we did before we cut her hair. But instead of adding hair into the braided headband, hair was taken away from the braid this time around.
Friday, August 13, 2010
Chutes and Ladders Hairdo
Silly name, I know. But, do you see the "chutes and ladders" in this hairstyle? Yep, we've even resorted to using board games to name a hairstyle. :) What next?
So, begin by parting out a square on top of her head and putting the rest out of the way in a ponytail for now. Then, make a diagonal part in the front of the square, smooth the hair to the side and secure with an elastic. This will make the first "chute."
Then part out another row and make a "ladder" by adding elastics all the way across the row. (When you get to the end, add in the ponytail from the first section.)
Add another chute......
And another ladder and chute. Just keep going until you get to the back of the square.
At this point, you can add some pigtails, a ponytail, a side ponytail, braids. Whatever you want!
I thought this might be a cute hairstyle for soccer or gymnastics. I like hairdos that keep her hair out of her face for sports.
We took out the messy pigtails before she went to bed and left the top in while she slept. In the morning, we added some quick pigtails and she was ready in 2 minutes. Sometimes recyclable hairstyles are nice!
Tuesday, August 10, 2010
How To Make A Fabric Rosette Headband
We've seen these fun vintage looking fabric flower rosette headbands all over the place lately. The princess and I think they're extremely cute, so we decided to dust off the hot glue gun and give it a try. The princess helped (this is a great craft to do with your girls) and we ended up making quite a few headbands to match some of her back to school outfits. I'm sure they'll come in handy when we need a quick hairstyle for school!
It's actually pretty funny that I'm posting a DIY craft tutorial on this blog. :) I've mentioned this before, but let me remind you that I'm not a crafty person at all. I really dislike sewing and rarely use a glue gun or fabric. So... if I can do this, you can do this for sure! This is a "no sew" method and was actually really easy and quick (even for me, lol.)
Items needed:
scrap fabric
hot glue gun
scissors
felt
pencil
basic headband
Video tutorial 1: How to make a fabric rosette....
Video tutorial 2: How to attach the fabric flowers/bling to the headband.....
Of course, you can get creative with this and make all kinds of cute variations. You could add embellishments such as buttons, beads, feathers, jewels, tulle, lace, etc. You could make the rosettes out of ribbon or you could even make your own basic headband instead of buying one like we did. We made one of these hair accessories using an old pair of jeans for the flowers that turned out to be our favorite headband. If you try this, we would love to see the creations and ideas you come up with! Feel free to inspire us by posting pictures of your finished headbands on our facebook page!!
Thursday, August 5, 2010
Quick Triple Twist
Nothing too exciting or unique, but here's another super quick 5 minute hairstyle for those of you who have already started a new school year or are needing back to school hairstyles soon.
Oh, and before I start with this hairdo, let me clear something up.... When I posted this hairstyle for long hair last week we had several people ask how in the world her hair grew out so fast after donating to locks of love!?! Well actually.....it didn't! That hairstyle (as well as this one) were done long before she got her hair cut. They've just been sitting on a memory card in our camera. So... don't be alarmed if you see shoulder length hair one day and waist length hair the next. Nope, we don't have a secret concoction for growing hair and we're not using wigs or extensions lol. How exciting (depending on my mood) you never know what length of hair you might see when you visit this hair blog. A surprise, teehehe!! ;) So anyway, back to the hairstyle: Make a side part on top of her head. Then make 3 sections and add a twist braid in each one like so....Then simply braid the twist braids together into a regular 3 strand braid. You may end up with the parts showing a little bit where you made the 3 sections. If you don't like seeing scalp, spray a little bit of hairspray where the problem is and run your comb down over the part to bring the hair together on both sides. Took less than 5 minutes. :)
I think it almost looks like a french twist braid on each side with a complicated corkscrew braid in the middle. But of course, it's much faster and easier than all of that!
No need to get up any earlier than you have to, right?
Subscribe to:
Posts (Atom)