I wanted to make a book of hairstyles for my princess, kind of like a scrapbook. And well, I figured as long as I was going to the trouble of making one for us..... I might as well make some books for our readers to enjoy as well, so I did!
Here it is! Our very own hairstyling book!!
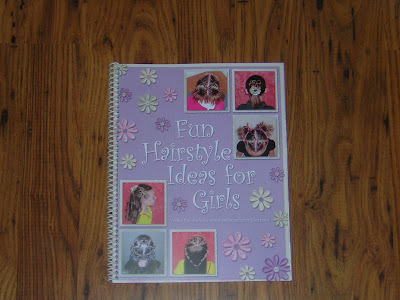
 The Princess and I chose 15 of our favorite unique hairstyles from our blog (http://princesshairstyles.com/) and 1 more hairstyle we love that hasn't been posted. So, 16 total hairdos. The book is 8 1/2"x 11" and 66 pages long (all in color on quality paper.) Of course I included step by step pictures and written instructions for each hairstyle (just like the blog.) We also made sure to pick out a binding that can lay flat on the counter so that the pages aren't giving you trouble while you're trying to do hair. I find it inconvenient to go back and forth between the computer and the bathroom when we're doing a hairstyle and wanted something to look at right on the bathroom counter, so this has been great! This would make a nice gift for a princess! I did my best to keep the costs down so that anyone who wants a book will be able to afford it. :) These books will be on sale for only $16.99. If you want more than one book, I will combine the shipping to save you shipping costs as well. To purchase, just use the paypal button on our right sidebar! --->I've had a few people ask about shipping internationally. I would be happy to, but the shipping costs may be a little more. If you are interested in purchasing and you don't live in the U.S. or Canada, email me your address and I can send you a price for shipping. I will ship to Canada for the price listed. Thanks! hair4myprincess at yahoo dot com.
 Btw, this is easy too. You don't even need to know how to french braid!
 Make 2 small sections next to your side part and braid both sections. Make one of the braids start towards the front of her head, and the other closer to the part.
 Slick down the front sections of hair on both sides and including the braids, tie everything together underneath with a clear elastic.
 Here's what it will look like from the side.....
 Take out the ponytail and make a temporary small section of hair on top. (Like a small half pony.)
  Part out another section of hair behind the first one and rat! (I don't like to rat the princess's hair very often because it's a pain to comb out AND it seems to damage the hair if you do it a lot.) I would save something like this for a "once in awhile" thing, but that's just my opinion.
 You end up with a big old mess like this!
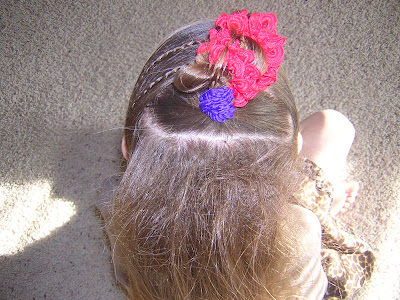 Now you can bring the hair in the first section you parted out over the ratted mess and secure it with some bobby pins. These cute bobby pin flowers came from
  I flipped the ends under slightly with our


 Begin with a section parted from ear to ear and a side ponytail. Speaking of side ponytails, did anyone else notice that the eighties styles are coming back in? (Even for moms.) I actually went shopping for the first time in a LONG time the other day and ended up buying some "stretch pants" and a long sweater dress thingy! I swear I had the same outfit in 3rd grade. And.....it's a good thing the sweater is long. (Because well.... lets just say that the stretch pants are not as flattering as I remember them being in 3rd grade, lol.) Anyway, back to hair.......
 At the back of your part, part out another strip of hair and make some
  Don't go all the way down to her ear with the "strip of hair." Leave the sides as they are for now.
 Make a loose french braid from one side to the other with the remaining hair. With this braid, only take hair from the front. And what I mean by "loose" is; hold it out across the back part as you're braiding. You want it to cover the part later. End the braid with a clear elastic by her ear and add the ends to the ponytail.
 Using your finger as a guide......
 Thread the twist braids up through the french braid.
 Ooops I missed a spot, oh well. Anyway, as you can see...... all the twists are threaded through the braid. Notice that you can still see the part. We'll fix that in a minute.
 If you made the french braid loose enough, you should be able to sort of pull it down over the part by gently tugging on the twists as you add them to the ponytail.
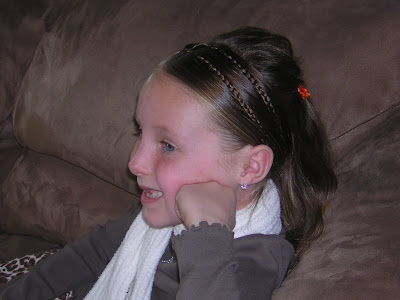
 If you want to cover the elastic where you ended the braid, add a cute flower to the side. Oh and of course we had to add some bobby pin flowers to the ponytail as well.
 We braided in a few more twists in the ponytail at different lengths, just for fun.
 The end.
 Oh and btw, do you see anything missing here? Just testing to see how observant you are. :)
 Start with a part from ear to ear and one down the middle.
  Inside out french braid one side from her ear up to the middle part. Only take hair from the front to keep the braid next to the part.
 When you get to the middle, continue with a regular braid at an angle towards the back of her head for a few plaits.
 Resume the french braid, taking hair from behind the temporary ponytail (again only adding hair to the front of the braid.)
 Repeat on the other side. It should end up looking like this......
 Now, at this point you could either leave the braids hanging how they are. Or, pull them together in the middle as shown here. The gorgeous flower in this picture is from
 This is where you could do pretty much anything you wanted! Make some kind of a design with the little braids by stringing them through the french braids. I just used my finger to poke a hole through the french braid as a guide, then followed the tiny braids right through.
 Create the design you want, then tie everything together at the base with an elastic.
 Add a cute hair accessory and some curls. (This darling flower also came from


