Showing posts with label Curls. Show all posts

Tuesday, April 26, 2011

Taylor Swift Hairstyle - "Love Story" Updo


Taylor Swift curly updo hairstyle from the music video "Love Story"

Taylor Swift UpdoThe Princess is a big fan of Taylor Swift's music. We happened to see her Love Story video and of course fell in love with her hairstyle in the video! We've been wanting to try it for awhile and finally got around to it this weekend.

At first I tried to place the headband underneath her hair that is swept up and twisted on the sides. (The same way Taylor Swift's hair is in the video.) Well, the headband kind of got lost under all of those curls and was barely visible. :)
Updo with headband hairstyleSo, we ended up moving the headband on top of the hair and more towards the front of her head where it could be seen.

I'm loving this vintage princessy look! Of course, it doesn't look exactly like Taylor Swifts hair, but pretty darn cute either way.
wedding updoI could see this working for a wedding hairstyle for the bride or flower girl. Or maybe a hairstyle for prom or other dance.
taylor swift hairstyle love story
To complete this style, you will need:

Naturally curly hair...... or some curlers or curling iron.
An elastic
Several Bobby pins
A headband, ribbon or other accessory for some added sparkle. (In case you are wondering, we purchased our headband at regular old Walmart. I believe it was made by Goody.)

And here is the video tutorial:
Our princess was so thrilled to have matching hair with her favorite singer Taylor Swift! She said this is her favorite hairstyle so far. ;)

Monday, February 21, 2011

Curling Iron Ringlets


Making Ringlet Curls Using A Curling Iron

We've had some questions regarding how we curl the princess's hair. And.... how we get the curls to stay in.

We actually use several different methods for curling:

Sometimes we braid her hair into cornrows while it's wet, then take the braids out (after the hair has dried) to make a crimped wavy look.

Sometimes we use our flat iron for waves and spirals. We have a video showing how to do that here: How to curl with a flat iron.

Sometimes we use curlers or rollers. I've found that this method seems to hold the curl the best and longest. And I like that no heat is used during the process, but it is time consuming to roll the hair and wait for it to dry.

Most of the time we use our regular old curling iron to make curls.

All of the curly hairstyles shown below were made using our curling iron with the technique shown in this video: (Which btw was taken before we got her hair cut.)

(Our twisty flower girl hairstyle, our basket weave hairstyle, and our Barbie hairstyle.)
ringlet hairstyle ringlet curls

curly hair making curls with a curling iron
Our own little curly hairstyle gallery! :) And...Here's our "How To Curl Long Hair With A Curling Iron" video tutorial: For getting the curls to stay in, I usually spray some hairspray on her hair before and after we curl it.... that's it!? Unfortunately I don't have any huge secrets. I think a lot of it has to do with hair texture. Some hair seems to hold curl well, and some just doesn't. You may try experimenting with different hair products if you're having trouble keeping curls in. And of course, if you have any secrets or suggestions for keeping "hard to curl" hair from falling out, please leave a comment under this post for us. You may help someone out! :)

Friday, December 31, 2010

New Years Eve Updo


This New Years Eve hairstyle is actually from last year. I love it so much that I had to post it again!

A fancy schmancy updo for a special occasion. Maybe a New Years party, or even a flower girl hairstyle! She actually wanted a princessy type hairdo to go with her cute new Christmas dress.

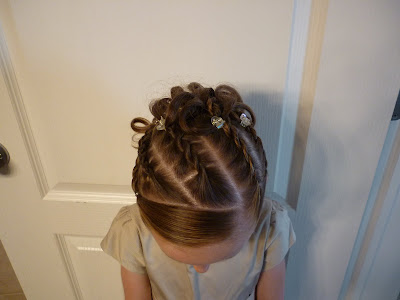
christmas dress Make the parts first. We did one section in the front for her "bangs." One across the back going from ear to ear. And four diagonal sections going from the front to the back part. Put each section in a temporary ponytail to keep everything separated.

Slick down the bangs and secure them above her ear with a clear elastic. Then, do some kind of a french braid in each of the four diagonal sections. We did french twist braids. If you don't know how to do that, we have a video tutorial at the bottom of this post.Place the finished braids up out of the way and pull the remaining hair into a ponytail. I did an upside down pull through in the ponytail to add a little volume.Next, gather all the braids directly underneath the ponytail and secure with an elastic. (You should now have 2 ponytails on top of each other.)Curl all the hair in the 2 ponytails.Now, to make the ponytail a little fancier: There is no exactness to this part. Just grab little sections of hair and sort of loop them around and secure them to her head with either bobby pins or little claw clips like this......Do as many sections as you want to. I think we ended up using five clips total.new years eve hairstyle All done!
special occasion updoupdo for little girlstwists in the frontfrench twist braids This sweet little dress came from "Madison Browne" via a blog contest on This Mom Can Shop. It was one of her favorite Christmas presents this year! She looked just like a little princess with her fancy hairstyle and dress.
flower girl dress
Here is a tutorial showing how to make the french twist braid cornrows:
I hope everyone had a Merry Christmas!! Ours was great. We'll see you all next year. :)

Friday, October 22, 2010

Candy Corn Hairstyle


We've been having lots of fun creating Halloween hairstyles this year. And making a candy corn was actually the Princess's idea! She had big plans to use hair paint and the whole bit!! Well, I opted to keep it simple for school and stay away from the paint. :) It probably would have looked more like a candy corn if we would have done it her way though. halloween hairstylesThis was super easy and quick. I'm guessing no instructions are even needed, but what the heck....
We parted it on the side and added a row of orange elastics. Then split the 2 middle ponytails in half and added a row of white.
Split the middle white ponytail in half and added a row of yellow.
And lastly, one more orange elastic.
When the candy corn was completed, I added a few flat iron curls.
candy corn hairstyle
fun halloween hair If you want it to look more like an actual candy corn, you could use some paint as the princess suggested. Or maybe add some ribbons. I think it's pretty cute the way it is though. Nice and subtle.
candy corn hair
cute halloween hair

Friday, September 24, 2010

Picture Day Hairstyle


Ok, this hairstyle isn't anything new, unique, or extra special. ;) But, we've had lots of inquires lately about suggestions for hairstyles for picture day. So, I thought I would show you what we did for our picture day hairdo this year, just for an idea.

These pictures were quickly taken as we literally ran out the door for school. :) Kind of a last minute thing, ya know?
picture day hairdo This hairdo reminds me a little of this hairstyle by Jenn, which I adore. This would be the picture day/ short version of that one!
braided hair style for pictures As you can see, it's just a square on top of her head, divided into 3 sections. I french braided the back 2 sections and then added the "bangs" into the elastic with the braid in the front. Next, I sewed in the ribbon with our trusty craft needle. And lastly, added a few flat iron curls.
school pictures hairstyle I usually like to leave her hair mostly down for pictures. And something fairly simple/classic as well. Hopefully she won't look back on this picture years from now and hate her hair. LOL I have a few pics from my school days (as I'm sure some of you do as well) with really, really awful hair! We're talking huge bangs, etc. hehehe
hairstyle for picturesHere are a few more hairstyles we've done for school pictures in years past for more ideas: picture day hair 1picture day hair 2picture day hair 3 So, I'm curious. Have you already had your school pictures taken this year? What did you do for the hair style?? Or what do you plan on doing, if it's still coming up?


Friday, September 3, 2010

5 Strand Ribbon Braid


5 strand braidIs it just me? I love seeing ribbons in hairstyles for little girls!multi strand ribbon braid Some of you may have already tried the 5 strand braid that we posted awhile back. This is just a fun way to spice it up a bit. I've also noticed it helps to add ribbons to a braid when you're working with hair that is on the thinner side. The ribbons make the braid look and feel thicker.

Enjoy!


Tuesday, July 27, 2010

Princess Style Headband - With Rays Of Sunshine!


See the little streamers of hair coming down from this braided headband?
headband braidThis fun hairstyle was actually inspired by a picture of a "ray of sunshine" the princess took all by herself off of our back deck! Do you see the resemblence? (kinda)
ray of sunshine
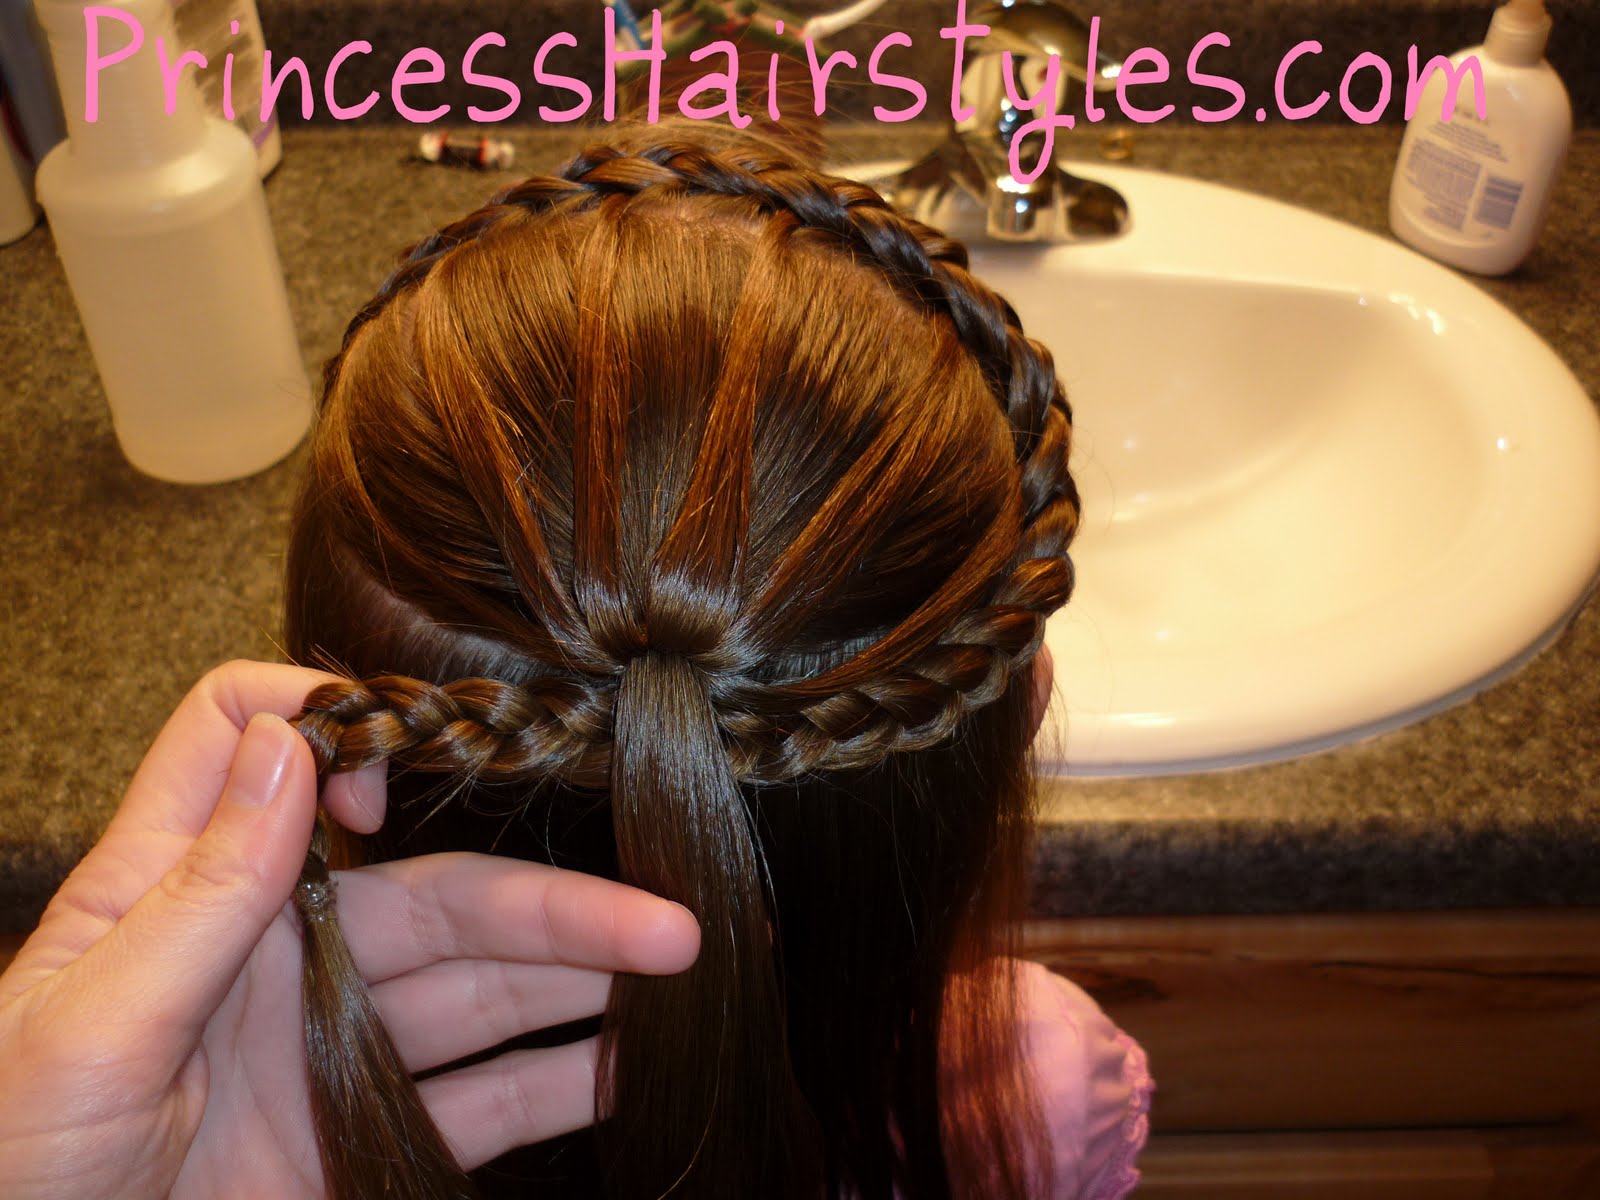
We both loved how this hairdo turned out. A classic braided princess hairstyle with some added "hair flair." To start: Make a part from ear to ear and pull the hair behind the part into a half ponytail. This step is optional, but I also made another small section in the front and pulled both sides of her "bangs" back together underneath her hair in the back with a clear elastic like we did in our Barbie Hairstyle. Now, this next step is hard to take a picture of, braid, and add hair in all at the same time! (I need a third arm.) But, I started inside-out french braiding (adding in hair only from the front) down by her ear. About every 2 plaits, I grabbed a small section of hair from the half ponytail and added it in with the french braid on the back side. Hopefully this makes sense. The arrows are trying to show you where to take the hair from and add in with the braid lol.
Continue braiding and adding hair from the half ponytail all the way across to her other ear.
What it will look like from the back...
Now you can bring the braid underneath the half pony. At this point if you wanted to, you could bring the braid all the way around her head to the other side where you started the french braid and tuck the ends under the braid with some clips/bobby pins to make a braided crown type of thingy.
Or.. wrap the braid around the ponytail, securing it with a clear elastic at the bottom.
Then of course, add some curls if you want!
braided headband
princess braids hairstyle for a princess