Sunday, June 29, 2008

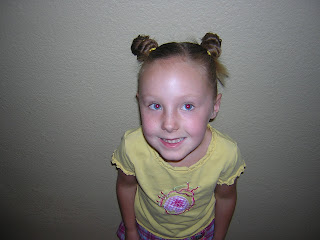
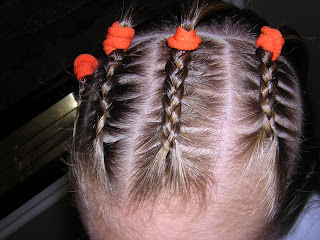
Princess French Braids And a Ponytail


Make a part, but only on the top of her head. (Either in the middle or on the side.) Smooth the rest of the hair to lay flat against her head. Make french braids on both sides, (only taking hair from the bottom, not the top.) Combine them in the middle with an elastic and add a bow.


Saturday, June 28, 2008

Carpal Tunnel Twisting Braids


I love how this turned out. But if you try it, you'll know why I call this "Carpal Tunnel!"
Start by making some twisting braids towards the front of her head. These are made by taking two strands of hair, and twisting each individual strand both in the same direction. Then, twist them together in the opposite direction. Make sense? Place elastics at the end, so they don't come undone.Now, you can pull them back into a ponytail with the rest of her hair.Braid the remaining hair in the ponytail into more twisting braids.Tie the braids into knots, leaving some hanging. (I like the messy look, but if you don't, you could put them more neatly in a bun and secure it with bobby pins.)
The top view.
The front.

And lastly, the side.

Friday, June 27, 2008

Bottom To Top Lacing With Pigtail Buns


OK, we went a little crazy today. Maybe a little over the top? But, it's Friday, what more can I say!!
Make a part down the middle, like you are making pigtails. Starting on the bottom of her head, make two little ponies on each side of the part. (Use a clip to keep the rest of the hair out of the way.) Take one of the bottom ponies and cross it over the part to add to the next pony up. Keep going, working side to side until you reach the point where you want to make the piggy buns.
To make the buns, twist the hair around itself and secure with an elastic. If you want, you can leave the ends out to spike a little like we did.


Thursday, June 26, 2008

Three Pull-Through Ponies


Make three little ponies on top of her head. Pull the elastic upwards and tuck the hair through the middle, turning it inside out. Go to my sidebar under quick search/videos for video instructions.


Tuesday, June 24, 2008

Headband with Curls


We did our french braid curls again, then added this headband. Grandma got her this cute dress and matching headband for Christmas last year. She loves it!


Monday, June 23, 2008

Hairstyles For Girls, Partial Corn Rows


Make the parts on her head for as many braids as you want. Put these in temporary ponytails to keep them out of the way while you're braiding, one at a time. I did dutch braids on these, you could do traditional french braids if you prefer.

Sunday, June 22, 2008

Hairstyle-The Scalp Saver


Lately we've had a problem with the top of my fair skinned princess's head getting sunburned. I've tried putting sunscreen on her scalp, but it always ends up getting all over her hair and just looks gross. So, this is our solution. It's also good for those days when you just don't have the time or energy to mess with hair.

Just fold a bandanna, piece of cloth, or scarf in half and tie at the back. This looks cute with her hair up or down.


Three birds with one stone here. Cute, practical, and quick.

Thursday, June 19, 2008

Crossing French Braids


Start by making a part all the way down the middle. Then, make another part halfway down her head from side to side (forming 4 sections.) Take the bottom 2 sections and one of the top sections and put them each in a temporary ponytail.

Starting on the top corner that's not in a ponytail, french braid down to the part (where all four corners meet. Take the bottom section (on the opposite side of her head) out of the ponytail and finish the french braid down to the bottom of her head. Repeat these steps for the other side. (On the second side, where the parts meet, you will have to do a small traditional braid over this area before you can resume the french braid on the bottom part.)

And, excuse the pajamas, we're being lazy today.

Tuesday, June 17, 2008

French Braid Over The Top


This style is good for keeping her hair out of her eyes without having to use a headband. (Which never stays in.)

Make a part across the top of her head. Put the rest of the hair in a temporary ponytail, to keep it out of the way. French Braid, from one ear to the other. (This is another one of those styles that is easier to do with the hair wet.)


Monday, June 16, 2008

Hairstyle For Girls, Pigtails With Buns


Start by making pigtails, either with a zig zag or straight part, whichever you prefer. On the last pull-through the elastic, don't pull all the way through and leave a little loop of hair. Then, take the ends, twist them, and wrap around the stump. Secure the buns with another elastic and add some cute bows.


Saturday, June 14, 2008

Ponytail With A Fish Bone Braid


I love these braids, they look really neat, and are so easy to do. Start by making a ponytail. Then, instead of taking 3 sections of hair like a traditional braid, make 2 sections. Take a small piece of hair from the outside of one of the sections and cross it over to the other side. Continue to repeat this step, alternating sides all the way down. That's all there is to it! I ended up making a fishtail braid video if you need it.


Here's a close-up of the braid.............


And, the front view.................


Thursday, June 12, 2008

2 Elastic French Braids


Start by making a part down the middle (or side if you prefer.) Make a little pony on each side, continue to work your way down her head adding the hair from each pony to the next one down. I think the pictures are more explanatory than my explanation, so here you go.....................


Tuesday, June 10, 2008

Basketball Net Hairstyle


I'm not really sure what the official name for this hairstyle is. Like I've said before, I'm no hair expert. But, my princess says it looks like a basketball net, so we'll go with that.

Start by making a part all the way across the top of her head. Divide this section of hair into five little sections and make little ponytails with colored elastics. Then, make another part across her head about an inch below the previous part. Divide this section of hair into four small sections. Combine the ponies on top with the ones you are making underneath, by splitting the top ones in half.

You could do any amount of ponies you wanted, or as many different rows as you have the patience for (alternating between adding a pony, and taking one away every row.)

Sunday, June 8, 2008

A Bun With Two Chains


This is one of my absolute favorites! I've found this works best when the hair is really wet. It makes it easier to smooth and tie.

Start by making a part on the top of her head. I chose a side part, you can do it in the middle if you prefer. Then, on each side of the part, keep two little boxes of hair out. (I put these in a temporary elastic to keep them out of the way while I pulled the rest back.) Make a low ponytail with the rest of the hair, smoothing the sides really well.
Starting on one side, take the two pieces of hair, cross, and tuck one end through the middle (like you are tying a knot.) Pull down to the scalp, as shown. Repeat this step, only this time, don't pull it tight. Leave a circle of hair by keeping it loose. Continue to repeat this, keeping the links of the "chain" the same size all the way down.Leave the one side hanging, as shown, while you tie the other side the same way. Then, pull both chains back to the ponytail and secure with another elastic.Now, you can make a bun by twisting the hair around itself and wrapping with a cute bow or scrunchy.

All done! Here's a side view.I love these chains! They can be used to make tons of different styles. I'll probably be posting some different variations of it later on. So....stay tuned!
Saturday, June 7, 2008

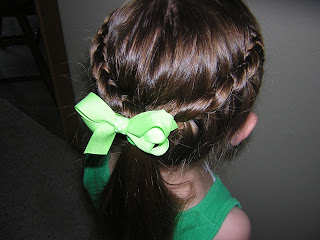
Curls After French Braids


These curls were made by French Braiding her hair while wet, (2 braids total, 1 braid on each side of her head) keeping the braids in overnight, then taking them out when dry.

Friday, June 6, 2008

Two French Braids With A Zig Zag Part


I used to do two french braids, with a straight part down the middle. This was cute on her when her hair was shorter, but the longer her hair gets, the less cute it is. So now, I like to do these french braids with a zig-zag part.

Here's the front............

Now, this hairstyle is good for two uses. I usually braid it like this the first day, while it's still wet after her bath, have her sleep with it in. Then, the next day, take it out and she has beautiful curls without having to do anything! I'll post a picture of the curls tomorrow when we take the braids out.