Showing posts with label Lacing. Show all posts

Friday, September 24, 2010

Picture Day Hairstyle


Ok, this hairstyle isn't anything new, unique, or extra special. ;) But, we've had lots of inquires lately about suggestions for hairstyles for picture day. So, I thought I would show you what we did for our picture day hairdo this year, just for an idea.

These pictures were quickly taken as we literally ran out the door for school. :) Kind of a last minute thing, ya know?
picture day hairdo This hairdo reminds me a little of this hairstyle by Jenn, which I adore. This would be the picture day/ short version of that one!
braided hair style for pictures As you can see, it's just a square on top of her head, divided into 3 sections. I french braided the back 2 sections and then added the "bangs" into the elastic with the braid in the front. Next, I sewed in the ribbon with our trusty craft needle. And lastly, added a few flat iron curls.
school pictures hairstyle I usually like to leave her hair mostly down for pictures. And something fairly simple/classic as well. Hopefully she won't look back on this picture years from now and hate her hair. LOL I have a few pics from my school days (as I'm sure some of you do as well) with really, really awful hair! We're talking huge bangs, etc. hehehe
hairstyle for picturesHere are a few more hairstyles we've done for school pictures in years past for more ideas: picture day hair 1picture day hair 2picture day hair 3 So, I'm curious. Have you already had your school pictures taken this year? What did you do for the hair style?? Or what do you plan on doing, if it's still coming up?

Monday, May 24, 2010

Ribbon Lacing For Short Hair


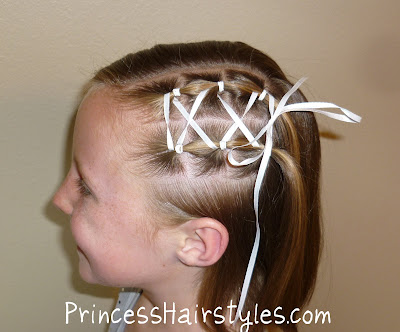
Can I just say that we're both loving the Princess's new short locks? I'm especially liking this cute laced hairdo on her! I think it has to be another one of my favorites. It's just really feminine and sweet.
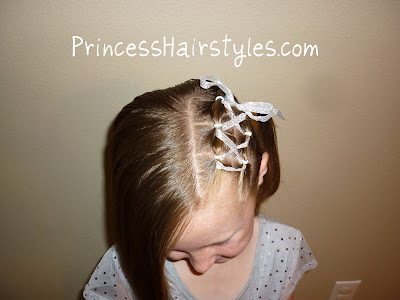
cute hairstyle ideaI love using ribbon in our hairdos and we've done several similar ribbon hairstyles on the blog with her long hair previously. This is just a quick and cute new lacing version that will work for girls with short hair as well as long. Start by making a side part and then parting out two rectangular sections directly underneath it. Then make a regular elastic braid in each section. (I did three sections in each row, you can do more if you want.) Now you can sew in the ribbon. I'm guessing you probably already know how to do the lacing, but we added in a video at the bottom of this post just for fun if you need it.

And no, you're not color blind. This picture was actually taken on a different day than we did the original pictures with the silver ribbon. For some reason I didn't get a decent picture of the side the first time.

corset hairstyle
little girl hairstyle
a line hair cut
hairstyle using ribbons Here's our video showing how to lace the ribbon if you need it..........Oh gosh, I don't think I'll ever get used to hearing my own voice on these videos. LOL It's just weird and I'm completely self conscious that I sound like a total dork. Am I the only one who has video/audio fright?? I really am a nerd. And yes, our "mid-blog crisis" is over. I changed the layout back to our old one (minus the background so it will hopefully load faster.) Truth be told, we both missed the cheery bright pink! The blue background seemed kind of depressing.

Friday, September 25, 2009

Twist To The Side Hairstyle


I've got a few new cute hairstyles ready to go that I'm excited to get posted. But, I just haven't had time this week. :(

Here's one from the past to look over until I get a chance to post something new. This one was originally posted a little over a year ago, in July of 08! An oldie!!

Start off with a diagonal part. Like this..............
Add two ponies in the front, on both sides of the part. Cross them.........

And, cross them again, making a twist. Make two more ponies, below the first ones, and add the hair from the previous ponies. Continue this all the way to the bottom of the part. (I added a temporary claw clip holding one side while I secured the other side with an elastic each time. Otherwise, it kept moving away from where I wanted it.)

At the bottom, you'll be left with two ponies next to each other. I did a twisting braid in each one, then twisted them together. (BTW, please excuse the mess in the background. My two boys were having a "lego party" while were were "playing princess.")
Wrap the twisted braid into a bun, leaving the ends on the top and secure with bobby pins.

creative hairstyle Spike out the ends with a flattening iron, and spray.
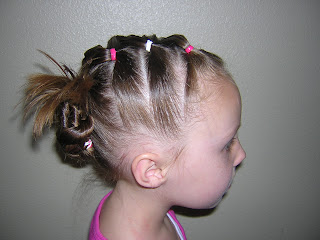
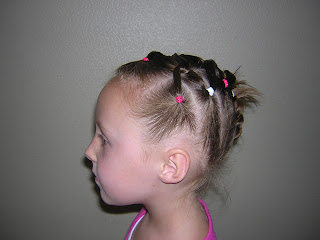
hair style for girls Another side view...............
cute hairstyle for little girls
The top.............elastic hairstyle And, the top/back....................twisty hairstyle

Monday, November 10, 2008

Double Ribbons Hairstyle


You've got to love the fingers in this picture. She really is a princess!!

Start with a part down the middle. Do your elastic braids on both sides of the part, adding in an extra elastic between the sections all the way down. If you wanted to, you could add in more sections, but it's much faster to just add the extra elastics and you get the same look.
I do the elastics with alternating colors to help with the confusion factor later, when I add the ribbons. Some of you smart ones won't need to do this, but it sure helped me! In this picture you can see there are only four sections on each side, but six elastics. That's what I mean by adding in extra elastics between the sections.Starting at the top, thread your first ribbon through the elastics. (Notice that I only threaded the pink elastics here.)
Now, thread another color of ribbon through the remaining elastics. you'll be left with one strand of each ribbon on each pony at the bottom. I just took them and tied a bow around each pony (with a double knot so they wouldn't come undone.)
This picture makes everything look really crooked. I didn't notice it looking off-centered the day we did this. Just don't worry about making it look perfect, most likely no one will notice but you!Did any of you have those shoes with all the laces....(I think they were called "LA Gear") when you were little? I wanted a pair of those SOOO bad when I was in middle school. My mom told me that shoes weren't worth twice as much just because they had an extra set of laces. She was probably right, but holy cow, I would have had so much fun with those!! I guess I'll just take it out on my daughter's head instead. P.S. I think this style would be so cute for certain holidays. You could use red and green for Christmas, orange and black for Halloween, red and blue for the 4th etc.

Friday, October 31, 2008

French Braid Mummy Hairstyle!


I had to do one last Halloween one!

Divide the hair into three sections. French braid the middle section, (I did a dutch braid.) Then, do elastic braids on the sides, crossing the hair over the braid all the way down.
Keep wrapping the hair around the braid when you get to the base and tie it off with an elastic in the back.

This wouldn't necessarily have to be just for Halloween. I suppose if you like it, it could be for any time. Happy Halloween!

Wednesday, October 8, 2008

Lacing With Wrapping Hairstyle


Just a friendly reminder: Please don't take the pictures of my daughter and post them on your blogs or other sites without my permission, they are copyrighted. If you want to use a hairstyle, feel free. Just don't take the pictures. Thanks!!

Now, back to hair. I've been excited to post this one, it was fun to do!

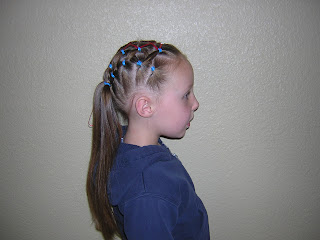
This is a style that has been done and re-done. I'm pretty sure the original "lattice ponytails" started on this site. This is just a twist on it, literally. So, you start by making two ponies in the front. In each pony, take out a small piece of hair and braid it. I did rope braids, you can do whatever. (If you don't know how to do a rope braid, click on the link for a video tutorial there!)

Wrap the braids around the ponies on each side and secure with elastics at the bottoms.
Take the two ponies, cross them and add them in with the next set. Do more small braids and wrap around these ponies. Cross them again and add them to the last set of ponies. Continue with the braid wrapping on the last set. You could either leave it like this.......
Or, pull the ends back up to your last set of ponies, secure with an elastic and curl the ends.


Monday, August 25, 2008

Elastic Pony Crosses With Ribbons


Do a part down the middle, and one on each side, all the way down. I did the elastics in the middle sections first. Part and cross the hair all the way to the bottom. Do both of the side sections by just adding the previous pony straight down. Add the ribbon last. Pull everything together with a messy pony at the bottom and add a bow.


I did a similar style awhile ago here. This is just the opposite, (hair crosses in the middle and ribbons on the sides.) (I've been trying to simplify my instructions because I'm thinking most of these can be figured out by looking at the finished pictures. Let me know if you want more pictures taken during the process and I'll go back to that.)

Thursday, July 17, 2008

Elastic Pony Crosses with Laces


This is another one of our favorites!

I started with the part down the middle. Take it all the way down, like you are making pigtails. Put one side in an elastic while you're working on the other side. I think it makes it easier if you complete one entire side first, then start on the other side. Hopefully you can figure this one out by looking at the finished product, I didn't take pics along the way.

Basically, just make two rows of ponies on each side of the part, crossing and adding the previous ponies all the way down.

I added the ribbon last. Thread it through the elastics, like you are lacing a shoe. Tie a double knot at the bottom, so it doesn't come undone.


I loved this for the 4th of July, with the red, white, and blue. So patriotic!

Wednesday, July 2, 2008

Inside-Out French Braids With Ribbons


Start by making two inside-out french braids, one on each side of her head.

Now, there's a hard way and an easy way to add the ribbon. If you want to do it the hard way, try braiding the ribbons into the braid while you're going.
Or, you can do it the easy way. Just take a needle, and thread it through the braid after you're done braiding. Just be careful!

What a pretty little princess!

Friday, June 27, 2008

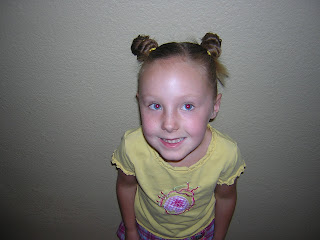
Bottom To Top Lacing With Pigtail Buns


OK, we went a little crazy today. Maybe a little over the top? But, it's Friday, what more can I say!!
Make a part down the middle, like you are making pigtails. Starting on the bottom of her head, make two little ponies on each side of the part. (Use a clip to keep the rest of the hair out of the way.) Take one of the bottom ponies and cross it over the part to add to the next pony up. Keep going, working side to side until you reach the point where you want to make the piggy buns.
To make the buns, twist the hair around itself and secure with an elastic. If you want, you can leave the ends out to spike a little like we did.