This hairdo is a "Princess Original!" She came up with this fun fourth of July hairstyle idea all on her own. :)
You may remember the collection of hairstyles for the 4th of July that we posted last year. You can browse through those if you're in the mood, and here's another crazy one to throw in the mix!
Of course this isn't the only hairstyle you could make "glow." After the Princess decided she wants glow sticks in her hair while she watches the fireworks on Independence Day, we had to come up with several more fun hairdo options using them! I'll post a few more if I get time before the 4th.
This one was fairly quick and easy. I made 3 cornrows with a zig zag part.....
 Then added the glow sticks! My advice would be to put them in right before you head out at night. The glowsticks we got lasted about 8 hours. They will probably burn out before you want them to if you add them too soon.
 This hairstyle would not only be fun for the 4th of July, but maybe even crazy hair day at school or at a night time party or sleep over!The Princess was pretty excited about this one as you can tell in this video showing how to add the glow sticks......Oh and the best part? She had darling curls after we took out the french braids for church the next day. 2 for 1!


 Braid the 2 sections and tie them together with an elastic at the back.
 The next steps are easier to explain by showing........
 If you wanted to wrap one braid all the way around her head and end in a side pony, you could do that as well.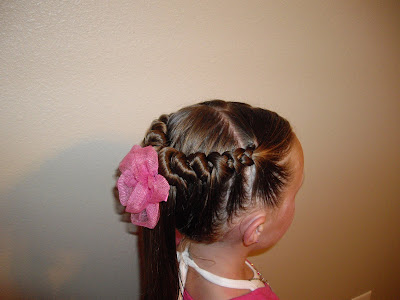
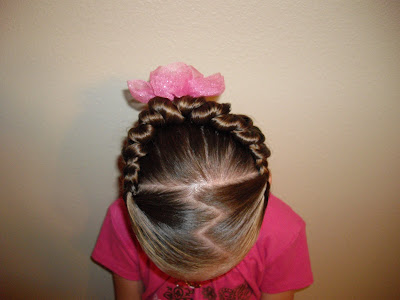 From start to finish, this took 6 minutes. Another good one for school! Thank you for sparking a fun idea, Chic Clips!
 Take one of the braids, fold it in half and put the end back through the elastic at the top of the braid.
 Now take the other braid and bring it through the loop you just made with the first braid. The same way you did the first one, put the end of the braid back through the elastic at the top of the braid.
 It should look something like this. (If your daughter's hair is a little shorter, try making the braids closer together to give you a few more inches to work with.)
 To keep it from drooping, place the braids where you want them and pin with a couple of crossing bobby pins. (I only used 2 bobby pins and it held all day long.) If you look closely you can see where I pinned it, at the top, to the left of the part.
 Add some cute clips or bows. We got these "


 Keep going. After you make the straight part on top, make a zig zag part down to the bottom. The idea is that it's supposed to look like a broken heart. At least that was the idea....
 See..... oval, not heart shaped. I really should have put one more set of elastics right there in the middle above the zig zag.


 Flip the ends back up to the top of the pony and secure with an elastic. We added a scrunchy, you can if you want, but it's up to you. Spike, curl, or just let the ends lay like we did. (It's still wet here, it'll look better later-after it has had time to dry.)


