Tuesday, December 22, 2009

Heidi Hairdo - Christmas Style


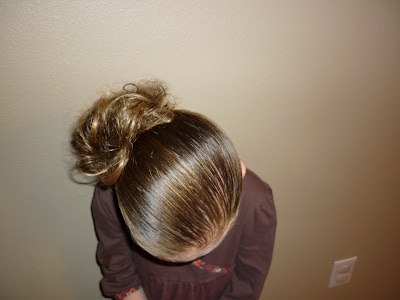
Ok, so I lied! I thought I was done posting until after Christmas. But, we did this hairstyle today and it turned out so cute. So, how could I not post it? :)

I only have one picture of the steps (sorry.) I wasn't planning on posting this at the time I was doing it! It's actually very easy though. Just make some pigtails and braid in a ribbon or scarf on each side. (I didn't have two scarfs available, so I added one to only one of the braids. Whatever works for you!) Leave out some of the scarf hanging on both the top and bottom of the braid to make bows later. Next, position the braids over the top of her head and sew them into place with a plastic needle and ribbon. Tuck the ends of the braids in with bobby pins of you need to. Then, make some bows on each side with the leftover ribbon or scarf. This took less than 10 minutes!


K, I posted this quick....... in record time! Hope it makes sense, lol. And now I'm REALLY done. I haven't even started wrapping (or cooking, or cleaning.) aaack

Monday, December 21, 2009

Holiday Bun


Christmas bun It looks like this will be the last Christmas hairstyle I will have time to post. We actually just got back from Disneyland! And now we have all the Christmas stuff to do. So, I'll be taking a Christmas break from blogging.

Just for fun, here's a little glimpse into our trip....... The Princess meeting another Princess!
Disney Princess Belle And now back to the hairstyle....

Make a ponytail (We did ours on the side. The middle would work too if you prefer.) Split the ponytail in half and run 2 ribbons through the elastic at the top. (You can see the red ribbon here. We added white as our second ribbon.) Braid both sides of the ponytail and secure with clear elastics at the ends.Form one of the braids into a circular shape and using a plastic needle, sew the ribbon around the braid. Don't worry too much about the end of the braid at this point. You can tuck it in later.Starting on the other side, sew the remaining braid around the first one with the other ribbon.Tuck the ends in with a few bobby pins. Then, tie the ends of the ribbons into bows so that they don't come undone and finish it off with a cute Christmas bow.

holiday hair style I put some french braids in front before we started the bun just for fun this time.


christmas hairstyle Another day we did this bun without the french braids and added some elastic braids instead.

little girls christmas hairstyleI hope everyone has a Merry Christmas and we'll see you after the holiday!

Thursday, December 17, 2009

Christmas Hairstyle - Holly Berries


First of all, I want to thank everyone who joined us in the "candle for Bryson" post yesterday. The enormous support shown to the Ross family was awesome and brought a tear to my eye. :)

And now, another fun holiday hairstyle....

hairstyle for girls This one is very simple. Just some barbie bangs and 3 knots to form the "berries." (Make sure to add an elastic to the bottom of the knots to keep them tight.)holly berry hairstyleWe stole some "accessories" off an ornament on our Christmas tree!holiday hairstyle for little girlsSorry about the dark picture. Don't know what's up with that?
holiday hairstyle christmas hairstyle
She had some braids in the day before which made some cute waves. We finished off the look by curling in some ringlets with our curling iron.

Tuesday, December 15, 2009

A Prayer For A Friend.....


For Bryson Ross I realize this is a hair blog. But sometimes there are more important things in life than hair, ya know? Late Monday afternoon my dear blogging friend (Shellie) lost her 2 year old son in a drowning accident. I have a 3 year old son, so it really hits home how devastating something like that would be. I can't imagine what she's going through right now. I'm joining the blogosphere in a special "Wordless Wednesday" dedicated to Shellie. If you want to join in, take a picture of a candle lit in honor of Shellie's sweet angel (Bryson Ross) and post it on your blog. (I ended up having to take the links off because it was messing up our page.) If you did a special candle post and want to add your link, please leave it in the comments. Thanks!

The Winner! (And Other Stuff)


Our winner of The Crafty Moms gift certificate has been announced! Go here to see who it is.

In other business: If you are wanting to purchase a hairstyle book as a Christmas present; today is the last day to order that it will for sure get there on time. We are leaving town tomorrow for a few days and won't be shipping out books during that time. If you order one while I'm gone, I will ship it out as soon as I return. It may make it before Christmas, but there are no guarantees. So, order today if you can!!! Thanks!

Saturday, December 12, 2009

Christmas Hairdo - The Christmas Tree


K, we have quite a few Christmas hairstyles ready to go. The Princess has been wanting "Christmas hair" ever since we put our tree up after Thanksgiving! Hopefully I'll have time to post them all. It's been busy around here (as I'm sure it has been for everyone.)

I didn't do step by step pictures for this style. I decided it would take too long and I'm guessing everyone knows how to do these connectors anyway. Make them in the shape of a tree by starting with one at the top and adding one more to each row all the way down. As you can see...the sides are connected, but the ones in the middle are just sitting on top.

christmas tree hairstyle
elastic connectors hairstyle
holiday hairdo Before she went to bed we added some braids so that she would have waves in the morning. Although this one took awhile (almost 20 minutes) she actually ended up wearing it for 3 days! It was worth the extra time.

Thursday, December 10, 2009

Giveaway!! The Crafty Moms - Gift Certificate


Just in time for Christmas! Head over to our giveaway blog for a chance to win a $20 gift certificate from The Crafty Moms!! (Adorable stuff, you don't want to miss this one.)

P.S. Please do not enter on THIS post. Go here to put your entries in: http://hairandshare.blogspot.com

Monday, December 7, 2009

Christmas Hairstyle - The Present


Here's the look we're going for ....... :)

christmas present graphic
A cute and easy holiday hairstyle!

To begin, make 3 regular braids, nothing fancy.


Side view.....
Tie all the braids together in the back with an elastic. Then, thread a ribbon onto a plastic needle and bring it up through the elastic to begin sewing.Sew the ribbon across the braid on the left, stopping at the top of the braid......Now heading back in the opposite direction, sew across the braid again, back to the elastic.Sew up and down the braid in the middle and the braid on the right. The end of the ribbon should now be back to the elastic again.Tie the ends of the ribbon into a knot (so that it won't come undone) and add a cute bow to finish off the "package." christmas hair Of course if you wanted to, you could just braid the ribbon right into the braids instead of sewing the ribbon on. That might be quicker. Whatever you prefer!
holiday hairstyle
Christmas Hairstyle She makes such a cute present!
hair styles for girlsOh and by the way.... My blogging friend (Trisha) over at momdot.com purchased our new hairstyling book last week and wrote up a fun post about it. She even modified one of our hairstyles from the book to try out on her cute daughter and did a great job! I love getting feedback and it's fun to see our little book highlighted on her amazing blog for mommy bloggers! To see what she has to say, and her cute version of one of our hairstyles, go here: http://www.momdot.com/howtohairstyles

Friday, December 4, 2009

The Hairpiece Hairstyle


I'm sure most everyone has seen these hairpieces around. My daughter refers to them as "fake hair" lol. Anyway, I've always thought of them as being a little weird and didn't really consider buying one. But, we ended up having to get one for her little dance group because they wanted everyone's hair to look the same. Well, I've been sold! Both The Princess and myself have been using it a lot since! (Luckily we have similar hair color.) It's just a quick, effortless way to do your hair!!

I love messy buns, but the longer her hair gets, the harder it is for me to make one. This is so much easier. And so fast on school mornings!

Just pull the hair into a ponytail and wrap it all up into a bun. The best part is, you don't even need to worry much about what it looks like. The hair piece will cover up any little pokies or mistakes. I just wrapped a clear elastic around the bun and left the ends out where they wanted to go. This literally took me less than a minute and no bobby pins were involved. :)

The hairpiece we got is from Sally Beauty Supply and is called the Revlon Ponytail Swirlz Hairpiece for $7.99. They also have one called The Twister, but the color we wanted wasn't available at the store we went to. I've seen these all over though, not just at Sally's.
hairpiece Anyway, it's super easy. You just wrap it around the bun a couple of times like you would a scrunchy and you're good to go. This is great for people with shorter hair too, like me. There was one morning I had to be somewhere and didn't have time to blow dry and straighten my hair. So I put my hair into a quick bun (which normally would look ridiculous and make me look pretty much bald) then threw this hairpiece in and actually looked somewhat presentable! If you have a little girl with short hair, this would be an easy way to make it look longer and fuller in lots of different hairstyles.

Here she is with her bun on the side and the hairpiece put in....
messy bunquick bun
hairstyle for girls 2 minutes and she's ready for school!


Thursday, December 3, 2009

Hana Elite Flat Iron Winner!


I'm a little late at getting to this, sorry. It's been one of those days.

To see who won the flat iron, go here.

Also, I've got a quick hairdo ready to post. Hopefully I'll get to it tomorrow!

Wednesday, December 2, 2009

Last Day To Enter, and Paypal Woes. If You Tried To Order A Book, Please Read.


First up, it's the last day to enter our flat iron contest. I'll be drawing the winner tonight!

In other business: I've had 2 friends and a family member each tell me they purchased a hairstyle book, but I didn't receive an order from any of them in paypal. So, I went and tried to buy a book from myself to see what was up. I noticed that I had to click on the pay button 3 times before it finally went through!!!! So if you ordered a book, you should have received a "receipt" in email from paypal. If you didn't receive a receipt, the order probably did not go through. If you still want one, check your paypal account to make sure you weren't charged and then you'll need to order one again (and click on the pay button until it goes away.) Gah, sorry! I just didn't want anyone waiting on a book that I never got the order for.

(If you're not sure if your order went through, email me and I'll let you know if I have it.) hair4myprincess at yahoo dot com

Thanks!