French Braiding, Circular Style
I'm not exactly sure of the "official" name of this braid, or if it even has one. I've seen it done before, but I've never seen the name. So, if you know... please tell us in the comments. :)
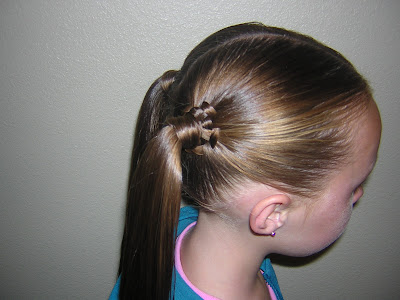
We're calling it the Never Ending French Braid Bun because it's hard to tell where the braid starts and where it ends! This could also be called a French Braid crown or a Halo Braid. Well, whatever you want to call it... it's a fun and unique french braid hairstyle that probably isn't done very often!
You could do this hairstyle in several different variations. We actually did a hairstyle using this same concept awhile back in a half ponytail. You can see that one here: Rays of Sunshine Hairstyle.
Here is the hair style using one single braid/bun:
 Or, you could double the braids up and make french braid pigtail buns!
 In pigtails, this actually reminds me of a Princess Leia Hairstyle. ;)
 Here's the video tutorial:
Of course if you wanted to, you could add some flowers or ribbons to this hairdo. I think it would be an adorable Hairstyle For Easter Sunday!




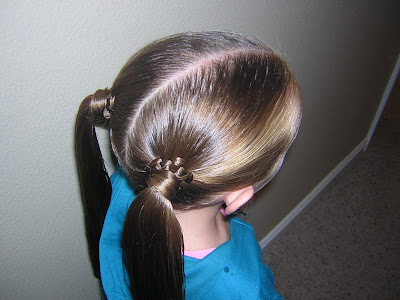
 After you are done sewing, take another small piece of hair and wrap it around the elastic of the ponytail. Secure with one more clear elastic at the bottom of the wrapping to hold everything in place. I pushed the hair up out of the way so you could see the elastic in this picture.
  We did this with pigtails one day.....
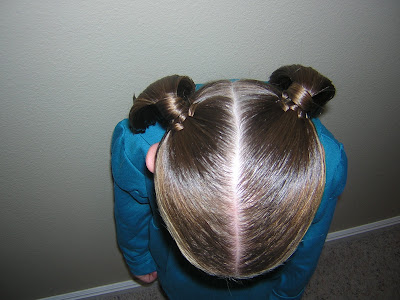


 Coming off of the center part a little ways back, part out a rectangular section of hair.
  Take the top inch or two of that section and clip it or flip it over to the other side to keep it out of the way for now.
 Take the hair you have left, brush it up towards the top of her head and braid it. (This may seem a little awkward since normally you would be braiding downwards.) It needs to go upwards to lay flat against her head though. Repeat these steps on the other side of her head.
  You should now have 2 braids, one on each side. Split the 2 sections you left out earlier in half and lay the braids through the sections, over the top of her head. Comb everything smooth and spray with a little water. To start the french braids: Make your first 3 sections by grabbing the hair on either side of the braids, then split each side in 2 (4 sections) now combine the middle pieces to make 3 pieces. It will lay much smoother if you start it this way.
 French braid like you normally would. The braid hanging down on each side will just become part of the french braid. You won't even notice it. Just make sure to take the elastic on the end of the braid out if you don't want it poking through. The french braid will hold the braid in place and keep it from unraveling, so you don't need the elastic.


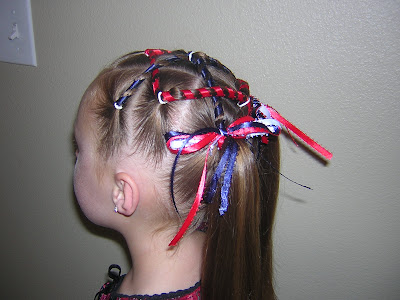
 Pull some red ribbon through the elastic of the middle front pony. (Try to make both ends the same length.)
 Split that pony in half and wrap the ribbons around both pieces of hair. Add them in with the 2 outside ponytails in the back. (Use a clip to keep one side from unraveling while you work on the other.)
 Same thing with the 2 outside ponytails, except don't split them. I brought this blue ribbon through the elastic the same way, then used both strands to wrap around the ponytail all in one piece. Add these both to the middle back ponytail.
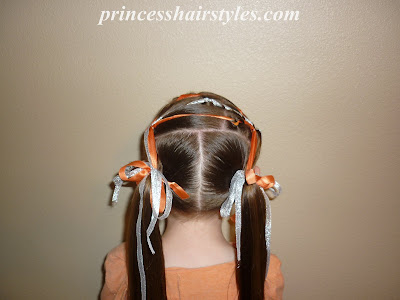
 If you want to leave her hair down. Stop right here. Just tie the leftover ribbon into bows and you're done! (I added some white ribbon as well just for fun.)
 Or, if you want her hair up, you can keep going. Make 1 more row of 3 ponytails underneath what you already have. Take that middle ponytail and split it in half. You should have 4 blue ribbons in this pony. Take 2 on each side to do your wrapping. Add these in with the 2 outside ponytails beneath. Now you can take the 2 red ponytails on both sides, wrap them up and add them both to the middle.
 Now, make 1 more row (of 3) with all of the hair you have left.
 You could add more ribbons to the last row if you wanted, but I didn't really think it would be seen and I was getting lazy at this point. Split the 2 middle ponytails on the top and bottom, then gather everything you have left on both sides into a set of pigtails to finish.
 Of course, tie the leftover ribbons into bows on the pigtails.

