Tuesday, July 27, 2010

Princess Style Headband - With Rays Of Sunshine!


See the little streamers of hair coming down from this braided headband?
headband braidThis fun hairstyle was actually inspired by a picture of a "ray of sunshine" the princess took all by herself off of our back deck! Do you see the resemblence? (kinda)
ray of sunshine
We both loved how this hairdo turned out. A classic braided princess hairstyle with some added "hair flair." To start: Make a part from ear to ear and pull the hair behind the part into a half ponytail. This step is optional, but I also made another small section in the front and pulled both sides of her "bangs" back together underneath her hair in the back with a clear elastic like we did in our Barbie Hairstyle. Now, this next step is hard to take a picture of, braid, and add hair in all at the same time! (I need a third arm.) But, I started inside-out french braiding (adding in hair only from the front) down by her ear. About every 2 plaits, I grabbed a small section of hair from the half ponytail and added it in with the french braid on the back side. Hopefully this makes sense. The arrows are trying to show you where to take the hair from and add in with the braid lol.
Continue braiding and adding hair from the half ponytail all the way across to her other ear.
What it will look like from the back...
Now you can bring the braid underneath the half pony. At this point if you wanted to, you could bring the braid all the way around her head to the other side where you started the french braid and tuck the ends under the braid with some clips/bobby pins to make a braided crown type of thingy.
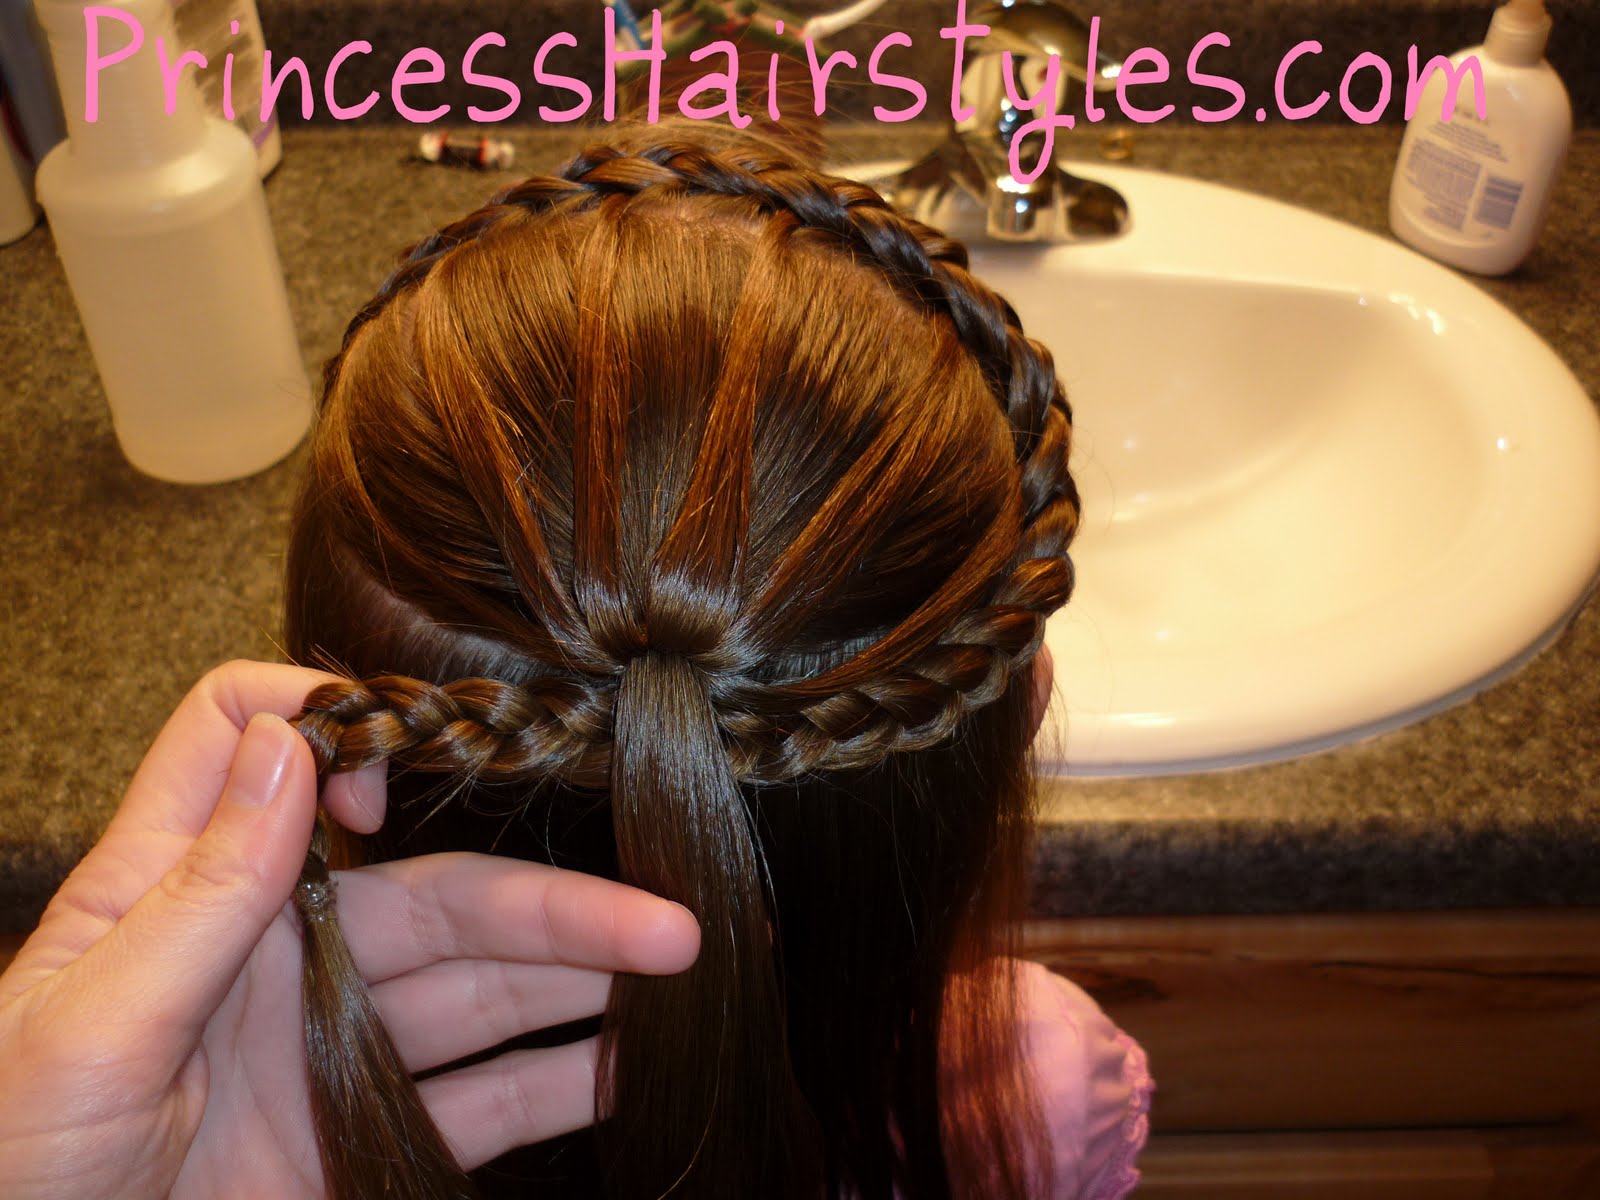
Or.. wrap the braid around the ponytail, securing it with a clear elastic at the bottom.
Then of course, add some curls if you want!
braided headband
princess braids hairstyle for a princess

Sunday, July 25, 2010

Monday, July 19, 2010

7 Strand Braid Video!


Here's the 7 strand braid video instructions we promised. Hopefully it makes sense. :) I found that the braid is easy to complete, but kind of hard to explain. Plus, I still have "video fright." I don't know why these silly hair videos make me so nervous, lol. I can feel my hands and voice start to shake every time I turn on the camera. Yes, it's really.....DUMB. What I wouldn't do for you guys though, geesh!

I'm hoping you'll be able to figure it out with our tutorial. Clear as mud? Let us know how it goes if you attempt it. And of course, we want to see pictures on our facebook page!
If you learn this seven strand braid, you should be able to make this type of braid with any amount of strands you want using this same technique! When the princess's hair was a little longer, I made an eleven strand braid on each side of her head one time for a wedding. (6 strands on one side of the braid and 5 on the other.) You can also make these woven flat braids into french braids by adding hair in when you weave the outside strand if you want to.

Good luck and can't wait to see your pictures!!

Thursday, July 15, 2010

Want To Learn This Braid?


This "7 strand woven braid" is one of our all time favorite braids! And yes, I did say SEVEN strands lol. It's surprisingly easy though (easier than it looks anyway.) We actually use it a lot but I've never posted it before because it's just too hard to explain the plaits in pictures. Well, we (finally) got a new camera that records for more than 60 seconds, YAY. So I just might consider trying to do a video on it if some of you want to learn. I was actually planning on finding a tutorial and linking you to it (that would be a lot easier!) But I've searched and searched and haven't been able to find instructions anywhere.
7 strand plaitSo... anyone interested in learning this one? Or maybe you already know how to do a 7 strand braid, or wouldn't use it? Let me know in the comments.
7 strand braidWhat do you think? Yea or Nay?

Tuesday, July 13, 2010

A Quick And Easy Twisty Hairdo


We haven't posted a hairstyle for girls with long hair since the Princess got hers cut. And I have to say, seeing these pictures makes me feel a little sad. This is one of the few long hairdos I had luckily saved to our SD card instead of on the computer when our computer crashed after THE haircut.


I actually made a video showing how to do this technique all the way down her head (kind of like a twisted looking french braid) and it turned out so beautiful! Unfortunately that video will be lost in cyberspace forever. :( If you want to do it, I bet you could figure it out though. Just keep going with this twisting technique all the way down. And if you do.... please, please post a picture to our facebook page so we can see it!


So anyway, enough rambling and back to the quick and easy twisty hair style.....
quick and easy twist hairstyleStart by making a part on the side (or middle if you prefer.) Then take a section on one side and start twisting... Twist it over to the other side of her head and secure it into place by taking a small chunk of hair where you want the twist to lie and add an elastic.
Next, take a section on the opposite side and twist.
As you're securing this one in place (the same way you did the first one) try to place it so that the twist is covering up the previous elastic.
Continue switching sides and twisting/securing as you go. This next picture is showing the 3rd twist I made.


We ended up doing 5 total twists this time. On the last elastic, I added a clip just for fun. Of course, you can do as many twists as you would like, as far down as you want to go.
twists

The finished look from the side......
princess hairstyle And the top....
twisted hairdo This hairstyle would look cute with the bottom curled in my opinion. But of course, we didn't have time for that the day we did this one.
twist hairstyle If you want to use bobby pins instead of rubber bands, you could do that too. For me, rubberbands seem to stay more secure and are easier to add. Do whatever works best for you! long hair

Friday, July 9, 2010

Double Faux French Braid


Here's the "double fake french braid" tutorial I promised from the other day. It's pretty much the same as our "no french braid floating braid," just taken up a notch....
unique french braidThis is a fun hairdo because just looking at it, people might think it's some type of difficult french braiding. But of course, it's super duper easy! Our little secret!!
cute hairstyle for little girlsOh, and if you want to make a fairytale princess hairstyle with the 2 braids on both sides of her head (like we did in the pictures last time) that would look adorable with these double braids as well.


Enjoy!

If you don't have a topsy tail, you can find one here.

Wednesday, July 7, 2010

"No French Braid" Floating Braid!


I know lots of you have been wanting to try the floating french braid, but haven't yet mastered french braiding. Here's an alternative "cheat" for you! Quick, easy, and absolutely no french braiding required. Hope you like!
floating french braid The how-to hairstyle video.......
And, the picture tutorial:

Begin with an off-center section on top...
Make a braid on each side of her head and connect in the back.
Part the section on top in half.
Starting on either side, take a small section of hair in front and bring it through the braid with a topsy tail. (If you don't have a topsy tail, you can find one here .)
Here's what it will look like with the first section completed. Continue taking sections and bringing them through the braid all the way back on both sides of the part.
The finished "non-french floating braid".....
waterfall braid Of course, we needed to add a cute flower to finish it off. I'm loving flowers in little girls hairstyles lately! So sweet and feminine....hairstyle with flower
fairytale french braid
fairytale braidOh and don't worry, the tutorial for the "double floating non-french braid" shown at the end of our video will be coming soon! :)

Saturday, July 3, 2010

CSN Stores Gift Certificate Winner


Our winner of the gift certificate has been posted! To see who it is, go here.

If you're looking for hair ideas for the 4th, I've got all of our ideas together here. Have a great holiday weekend!!