Hairstyles For Girls
Thursday, June 16, 2011
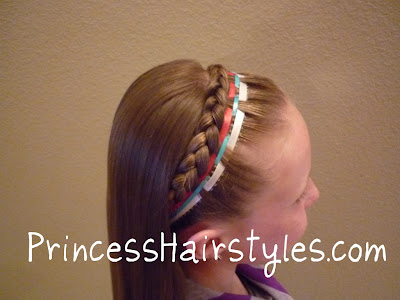
Fourth Of July Hairstyle, Ribbon Headband
We posted this braided ribbon headband a couple of years ago along with a few other hairstyles for the 4th of July and decided we needed to add a video tutorial for you.
Of course, this cute ribbon headband doesn't just have to be for July fourth. You could switch up the colors of the ribbon for any holiday or occasion. The princess requested this hairstyle several times last year for "spirit day" at her school (which is a day where they are supposed to wear their school colors.) I'm thinking this would be a cute hairdo for cheerleading, dance, gymnastics or other sports with her team colors. You could add a ponytail, bun, or pigtails if you would rather have her hair up for a sporting event..
Btw, a lot of you have made requests for video tutorials of many of our older hairstyles. I am working on going back through our hair blog and making some videos. Just keep in mind, it's a slow process. :) Hopefully I will eventually get to all of them.
Fourth of July Ribbon Headband Hairstyle:
What are your plans for the 4th of July this year? We'll probably be watching a parade, fireworks, and having a picnic. :)
Friday, June 10, 2011
"Pretties Please" Gift Certificate Giveaway Winners!
The 3 winning commenters of the Pretties Please $10 gift certificates (chosen by random.org) are....
tara said...
I likeed the Prettiies please on fb as well.
erin_allison said... I subscribed to the Pretties Please newsletter!Mindy1024 said...I love the peony flower bows and the flip flopsCongrats: Tara, Erin_Allison, and Mindy1024!Please send an email to Princess Hairstyles at gmail dot com to claim your prizes.And of course, thank you everyone else who entered. :)
Tuesday, June 7, 2011
Letters To Juliet Hairstyle
The Folded Half Ponytail Hairstyle From "Letters To Juliet"
Awhile back (around the time this movie came out) I did a post about some of the cute hairstyles in the movie "Letters To Juliet." This was right after we had cut the princess's hair for Locks Of Love and sadly she didn't have quite enough length to try and recreate any of the hair styles. Well, it has been awhile and her hair has grown quite a bit. Enough in fact that we were able to attempt this cute rolled, twisted and folded half pony!
Here is the original hairstyle on Amanda Seyfried (or Sophie in the movie.) Which I grabbed from the Letters To Juliet Trailer on Youtube.
And here is our attempt at recreating the style: Btw, I need someone to come to my house while we are filming a hairstyle and remind me to take pictures afterwards. Any takers? lol. This is the second time recently that I have forgotten to take a pic and have had to use a screen shot from our video!
So anyway, this is a great hairstyle for moms as well as teens, tweens, and girls. I actually tried this on my own hair when I got home from the movie the night I watched it and have worn it quite a bit since then.... so I've had some practice. I love that this hairdo is quick but still has an elegant look to it.
The Letters To Juliet Hair Tutorial:
As you'll notice while watching the tutorial, I only used 2 bobby pins to create the style. Depending on the thickness and texture of your hair, you may need to use more. This will also depend on the type of bobby pins you are using. We purchased the bobby pins used in this video at a beauty supply store, so they hold a little tighter than the usual cheapy version. You'll probably need to experiment a little and figure out what works best for you!
Monday, May 30, 2011
French Fish Braid Hairstyle, Side Swept
The Sideways Fishtail Braid
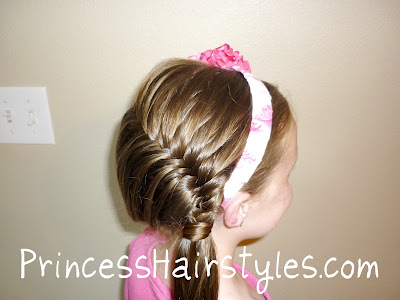
We posted a picture of this side swept french fish bone braid here on our blog and on one of our hairstyle ideas videos on Youtube awhile ago. Since then we have received request after request for a video tutorial. Well, here we are almost 2 years later finally getting around to it! :)
This unique looking hairdo is actually pretty easy and uncomplicated (although it is a little more time consuming than a regular french braid.) It also takes a bit to get used to making the braid sideways instead of up and down.
For me, this braid is easier to make with wet hair (since the princess's hair is naturally so straight and tends to get flyaways while dry.) But, depending on the hair texture you are working with, you may want to try it dry. If you have naturally curly hair, this would look adorable done with a more tousled, dry, beachy, look. Just do what works best for you!
And here's the video tutorial some of you have been asking for..... finally!
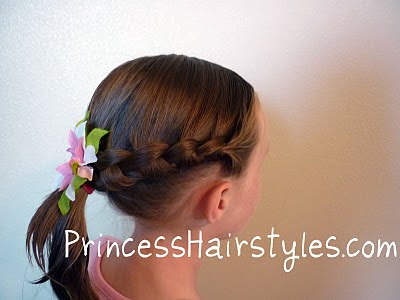
Btw, did you notice the adorable headband and flower accessories in these hairstyle pictures? I'm participating in a 3 part series of posts called "Mums The Word-But I Just Gotta Tell Ya" for All Things Ribbon. The fun mom (Jen) over at AllThingsRibbon.com sent myself and 2 of my hair blogging friends (Girly Dos and Babes In Hairland) these darling mums. Each of us are taking a day to post a hairstyle using her adorable creations! I can't wait to see what the other 2 hair bloggers come up with and will add links from this post when they get their hairstyles up so that you can see them too! You may also want to join All Things Ribbon on Facebook where you can keep up with Jen's latest creations and great deals!!
Update:
To see what Girly Do's did with these adorable mums, go check out her triangle curls!
And, click here to see Babes In Hairland cute Figure 8 Braid Side Pony!
Monday, May 23, 2011
Spiral Knot French Braid
This is a fun and unique braid that I sort of figured out on accident! :) We were doing our knotted french braid hairstyle for school one morning and with just a small tweak, it turned into this.......
In case you have forgotten what the original knotted french braid looks like, here it is below: As you can see when you compare these 2 braids, they really don't look the same at all. But as you'll notice in the video... they are made almost the exact same way.
(Sorry about the poor quality of these pics btw. I had pictures of this finished hairdo saved in draft when blogger had it's outage and well, they seem to have disappeared. Of course, I deleted the original pictures off of my card and didn't want to do the hairstyle over. So, I ended up just using a few screen shots of the video for our blog.)
Here's a picture of the back of this hairstyle. We have been loving side ponytails lately and I really like how this braid adds a little something extra to the style.
Another variation we did with this recently: This hair style was made with the same braiding technique shown in the video below. We just added another braid underneath the first one and took smaller sections to bring the "spirals" or "coils" closer together. There are lots of fun variations and hairstyles you could make with this braid.
And here's the Spiral French Braid Video Tutorial:
Surprisingly, this hairstyle only takes a few minutes to complete. You can be out the door for school, work or whatever in 5 minutes or less!
Wednesday, May 11, 2011
HANAair Professional Hair Dryer Review
I don't do a lot of product reviews on this hair blog (mainly for lack of time.) But, I couldn't pass this one up! I've been using the same hair dryer for years and it's pretty much on it's last leg. A common occurrence (while using my old dryer) is to be about halfway done drying my hair when it overheats and shuts off! I just really don't have time for it most mornings and it's becoming a huge pain. (I won't mention which brand it is, but I think it cost around $15 at Walmart if that tells you anything.) So.... when I was contacted by Misikko to give this Professional Hana Hair Dryer a try, of course I said yes. I have used several Hair Straighteners from this same brand, so I know how great their products are.
This hair dryer is nothing like my old one. It's probably not even a fair comparison. But, so far I love it so much more.
My favorite features are the adjustable heat and air settings. It has 3 heat settings, 2 fan settings and a cold shot button. I don't blow dry my daughter's hair very often, but when I do... she really doesn't like the heat. So the lowest heat setting is perfect for her. I (on the other hand) need some heat to help flatten and straighten my frizzy hair. :)
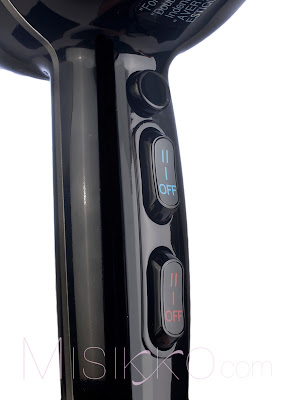
From the Misikko website: "This dryer has been Salon tested and Salon recommended since its inception. Inspired by Italian design, the combination of HANAair's strongest AC motor along with its tourmaline lined ceramic heater will dry your hair up to 60% faster maintaining natural shine while promoting healthy luxurious hair."
I wanted to test this dryer out to see if it really would dry my hair faster than my old store brand. My old blow dryer took just under 15 minutes to completely dry my hair.
I was almost shocked at how powerful this dryer was the first time I tried it. It really blows! :) And yes, it was much quicker- only taking 6 minutes!
The Pros:
Quick drying time Long cordAdjustable heat settingsGreat qualityIonic heat that is supposed to be healthier for your hairThe weight and feel of the dryer
The Cons:
Price. This hair dryer is on sale right now for $194.99. I'm a frugal person, so I would have a hard time paying that for a hair dryer. I'm thinking you would need to look at this as an investment in something that would outlast and outperform the cheaper products available and eventually pay for itself over time.So overall, would I recommend this dryer? Definitely yes!
*I was provided a hair dryer for this review by Misikko.com. No other compensation was exchanged. The opinions expressed are my own.
Friday, May 6, 2011
Baby Hairstyles - Elastic Halo
This will be our last baby hairstyle of baby hair week. It's been so fun, we may have to do it again sometime! In case you missed the first few baby styles of the week, here are the links:
4 connecting ponytails
Criss Cross Pigtails
Tiny French Braids
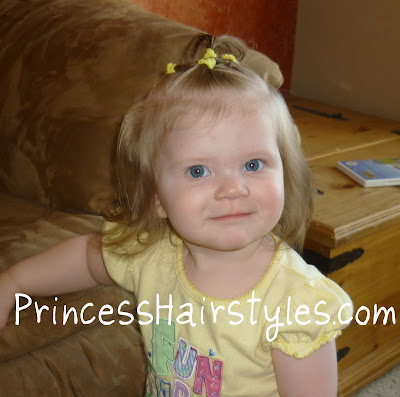
We're calling this one the "Elastic Halo Hairstyle"
To begin, part out a small triangle in the back and add a ponytail. Split that ponytail in half and take half of the hair over to the next ponytail you part out. Leave the other half of the hair there so that after you go all the way around her head (and end up where you started,) you will have something to add the last bit of hair to. I tried to make triangle parts all the way around, but since I was working on a squirmy baby... they didn't turn out exactly perfect. :)
We sometimes joke that she is the "queen" of our house since we are always at her beckon call. So, maybe we should have called this the crown hairstyle instead!!
If you wanted to, you could add a braid or twist between each elastic for some extra flair.
Have a great weekend everyone! And... Happy Mother's Day to all of the moms out there!
Subscribe to:
Posts (Atom)